Partnership Cake
My sister and her boyfriend are registered partners now, Congratulations!! If you don’t know what that is, to put it very short and easy, it is basically married but not as big. So she had a small party to celebrate and asked me to make her cake. I answered almost screaming YES!!! Of course, I want to make her “wedding” cake!! My other sister also really likes baking (the one from the Stitch cake) so she wanted to help me but unfortunately couldn’t physically help me baking because of work… But she helped design the cake with me. You might think why it is green XD Well that was her idea because my sister painted a wall in her new living room green, it is not an exact match XD But it is very close I did my best haha. My sister (who I baked the cake for) really wanted a chocolate cake, so I did my best to make it as chocolaty as possible!
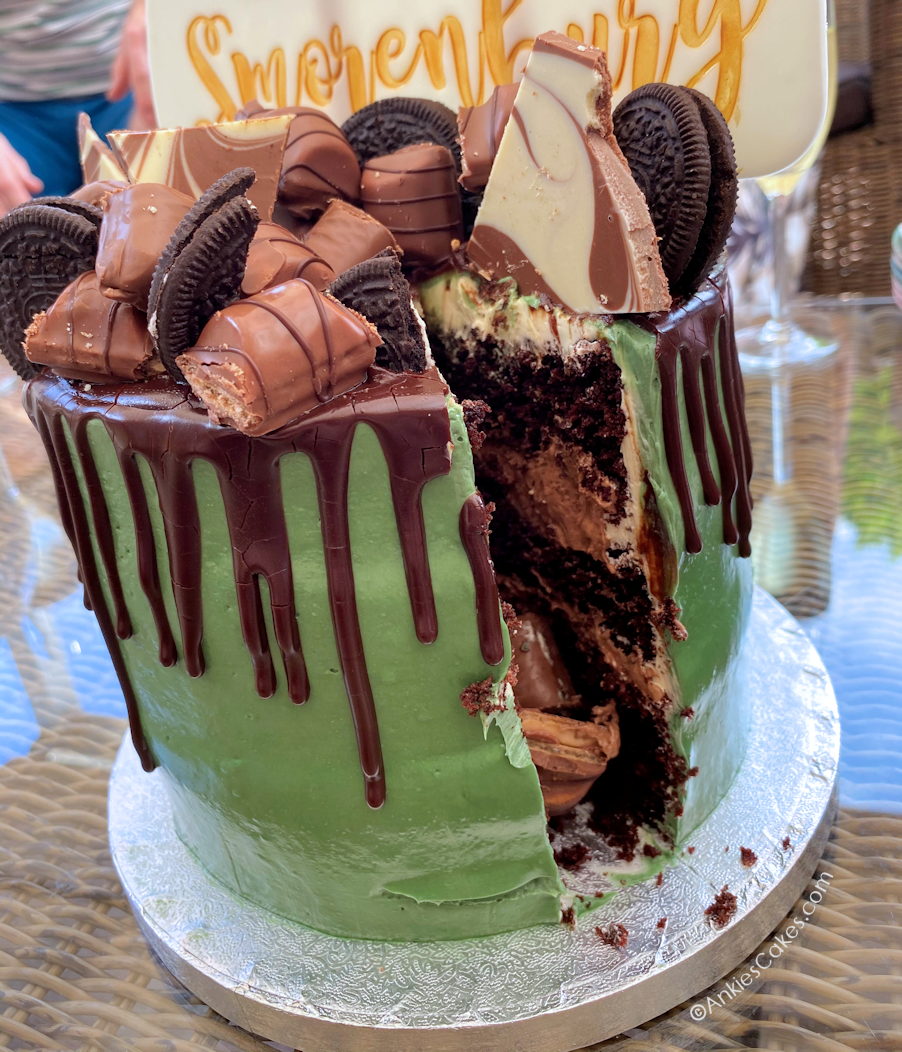
So for the cake itself, I baked a chocolate cake (of course XD), I baked the cake in 4 6 inch pans. We wanted it to become a drip cake so I wanted it nice and tall. But when they were baked and I started layering them ontop each other I decided to scrap one layer and go with 3 instead. The 3 layers were already quite high haha. So after the cakes where baked, I made the buttercream. First of I wanted to make a chocolate Swiss buttercream, but since my sister (who helped me) wanted the colour of the buttercream to be green I decided to make it easier for myself and made a vanilla Swiss buttercream. And for the filling a whipped up a chocolate mousse yummm!! I also sliced some strawberries in half to put in the middle because my sister loooovessss strawberries. So then I started stacking the cake. I started by levelling my cake layers and put one on the cake board, then piped a border of buttercream around it so the mousse would stay inside (it did not really but I will come to that XD). Then I poured on some mousse and putt the strawberries in as well. Then I laid on another cake layer and did the same with the buttercream, mousse and strawberries. When the 3 layers were on, I noticed that because of the weight the first layer of chocolate mousse was starting to spill out…. So I piped some more buttercream in there to stop it, but that didn’t really help… So I blobbed quite some on the side to help it stay at least a bit in XD And put it in the fridge quite fast, because if the chocolate mousse set it would also stop and stay in place. After half an hour, fortunately, it did set and not a lot was leaked out. So I could start crumb coating, when that was setting in the fridge I coloured my buttercream the (almost XD) right green colour. And I covered the cake with that green buttercream and put it back in the fridge to set completely.
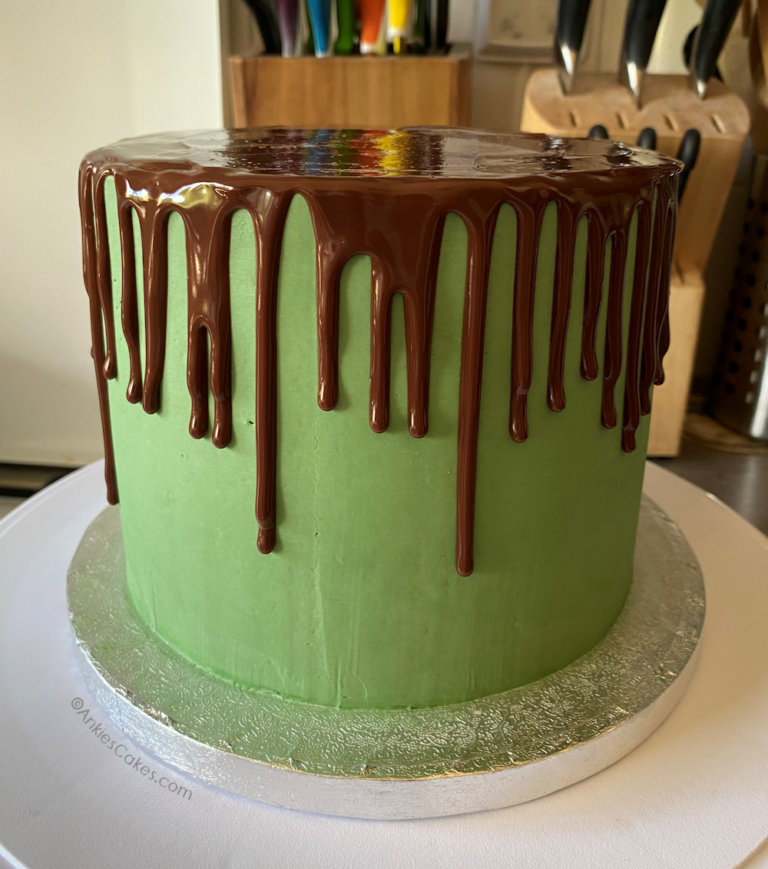
For the drip, I made a dark chocolate ganache (50:50 cream:chocolate) and waited for it to come to room temperature and become a bit less liquid. Then I poured it in a piping bag and cut off a small tip and started making the drips. When the drips were around the whole cake I piped some more ganache on top and spread that around with an of set pallet knife. Then I put it back in the fridge to set. And then the stranges thing happened, after, I think, 2 or 3 hours my ganache started to crack…. I had never seen this before, and don’t have an explanation for it… My sister, who studied for chef, also had no idea why it happened… So if any of you might have any idea please let me know, it still blows my mind haha. Unfortunately bringing it back to room temperature also didn’t help anything… As my mom would say “It’s fine, it still looks great and it won’t taste any different” haha thnx mom!
My sister (who helped me) really wanted a Mr & Mrs on top in chocolate, but first of it was more than 30 °C outside (and actually also inside… XD), and second chocolate just doesn’t like me haha. So I thought what is not gonna melt and easier to work with. So I
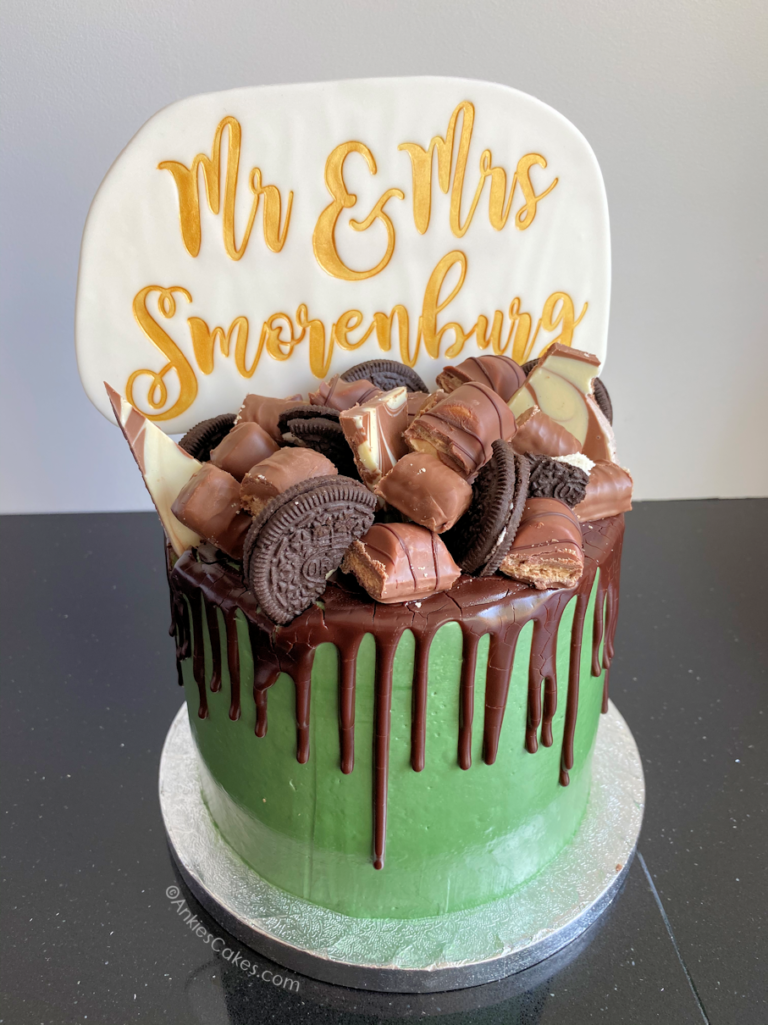
decided on using fondant since I already have a really cute letter set by sweet stamp. I used that to press the text in. But fondant on its own would probably not stay upright in one day… So I googled and saw that baking your fondant would harden it. I never tried it, I did, however, have heard it before so I gave it a try. And I think it worked…? I’m not so sure haha, it did stand up on the cake but it was still a bit flexible. But so you don’t make the same mistake, don’t put your fondant on a piece of parchment when baking it, because parchment paper wrinkles when it gets wet… and since fondant has some moisture in it that is what it did… So my fondant started to wrinkle a bit to… It’s not that bad but I would have liked it not to do that haha. So after it cooled down I painted the letters with some gold paint and my god that looked amazing!! I was really happy with it! If you are wondering why I baked it first and then painted it, I was actually scared of what would happen to the paint if I baked that to… so I didn’t haha.
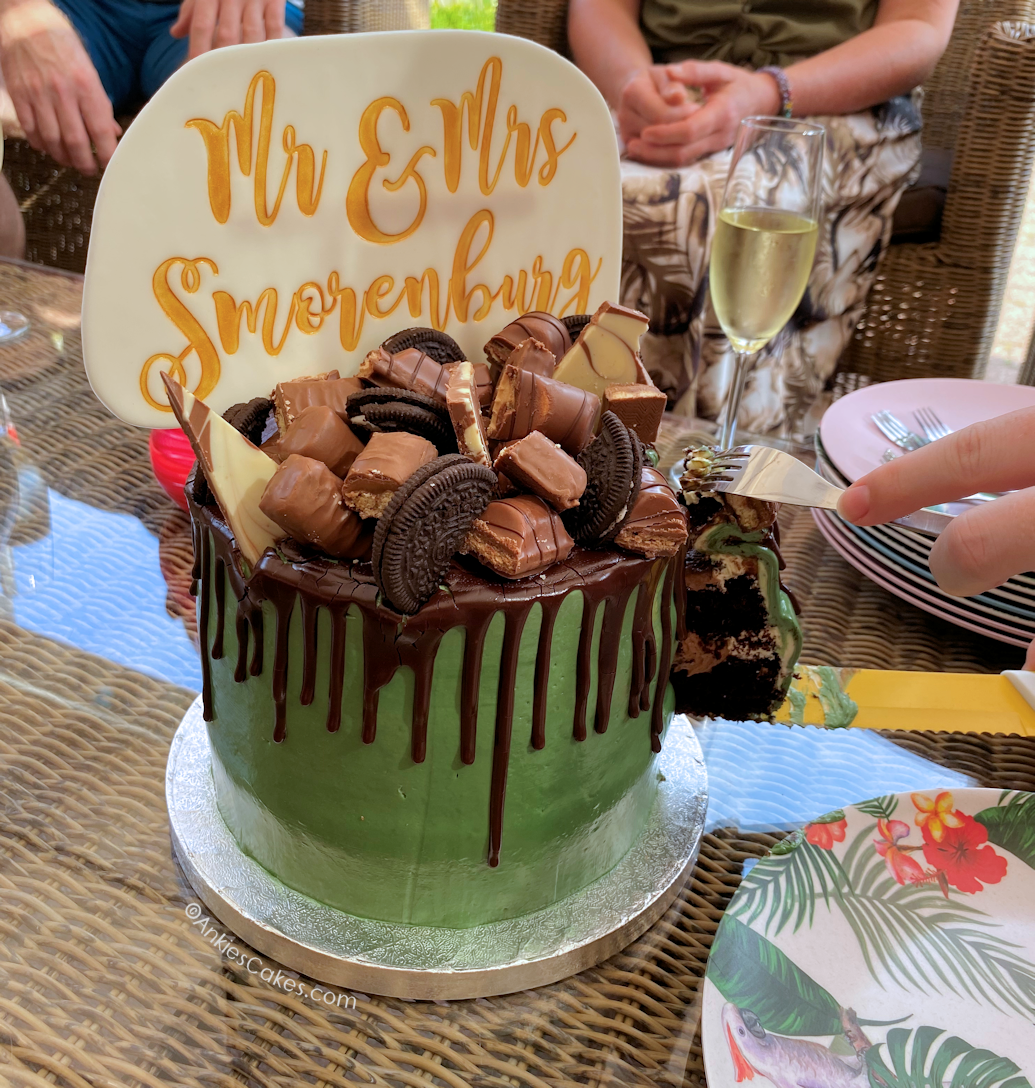
So the next day we went off to my sister’s party I packed the cake in a box and took some candy bars and oreo’s with me to decorate there. For 2 reasons, one because I didn’t know if it all would fit in the box I got, and two because my other sister could help me decorate it and nothing would collapse in the car haha. I actually glued some popsicle sticks to the back of the Mr & Mrs sign with some piping gel, I was too scared it would collapse so just to make sure XD. So when we arrived at my sister’s house I went to the kitchen first to safely put my cake down haha. Then with my sister (who helped me) we started decorating the cake with Oreo’s, Twix, Bueno’s, oh and I also made chocolate sharts with white and milk chocolate. Again it was 30+ °C so we did our best not to melt all the candy bars with our fingers haha.
Then the cake was done!! I was really happy with the result, it is kind of the first time I made such a cake. And I actually learned quite a lot from it haha. The rest of the family (my (grand)parents and his mom) all really liked it. It also tasted very nice, and some even took another slice :D! I hope you had a great time both!! Congratulations again!!