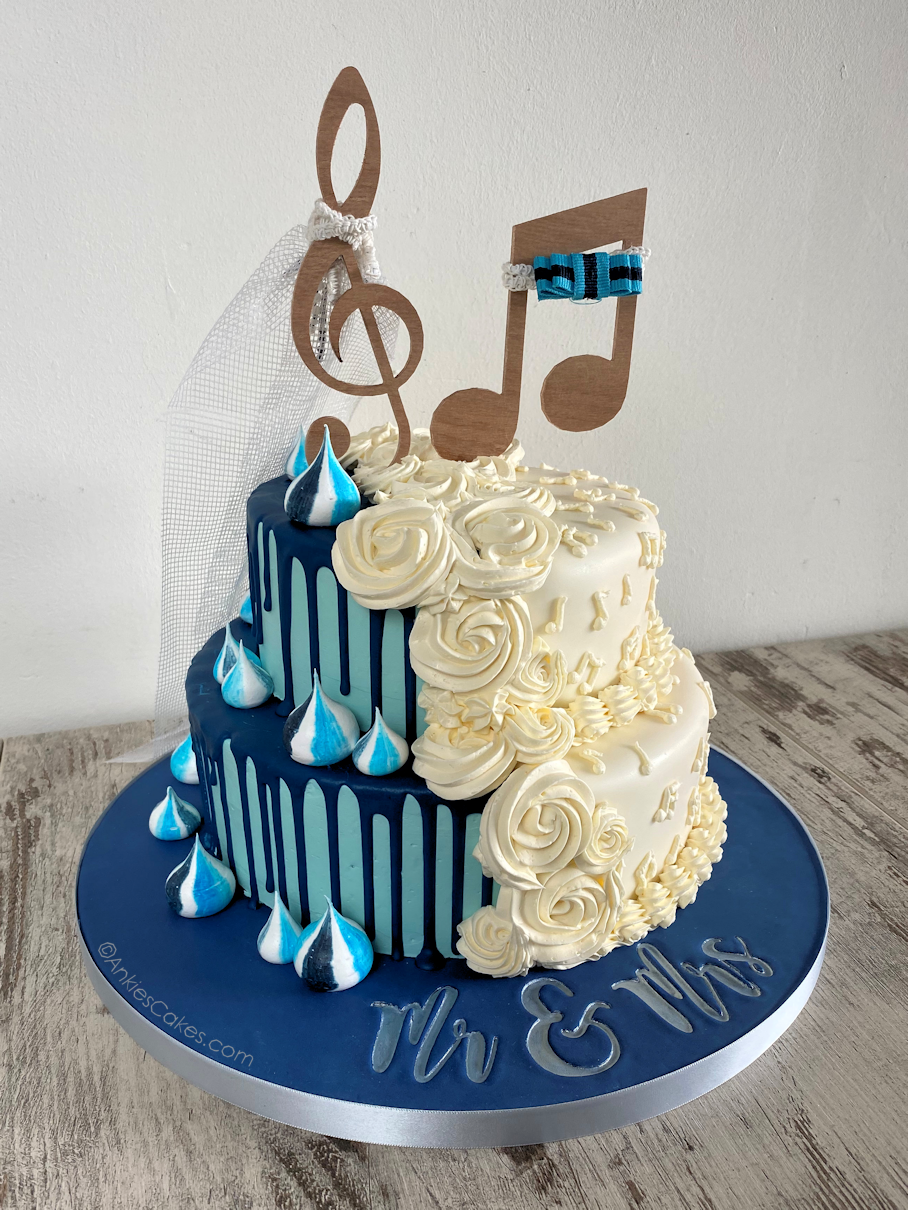
A friend of mine got married today! And she asked me to make her cake, I of course, said YES!!! Then she sent me sooo many pictures as a reference of what she wanted XD That is very helpful tho it is just funny to me when you get picture after picture with one or two things they like about that cake, and then this and that from that other one haha. But she was very clear about what she wanted which was very nice. She and her husband (now haha sound so official XD) met each other through playing music, so they wanted to have some big music notes on top and one side piped with them. The wooden ones on top were very nicely made by a friend’s dad of ours and decorated by the bride’s aunt. They turned out sooo cute! And really finish the cake!
So now on to the cake, I started by baking the cakes (as always haha). The bride wanted lemon cake, so I baked two 6″ and two 8″ lemon cakes. And let me tell you if you haven’t ever made that flavour cake, you should!! It is so nice and fresh tasting yum! For the filling she wanted raspberry. So I decided to go with raspberry buttercream since that is very nice in taste and still has a structure to it so it is also easy to work with. So for that, I made a thick kind of raspberry jam, by boiling frozen raspberries and sugar together for about 15 minutes and then push that through a sieve to get rid of all the seeds. I let that cool completely at room temperature before I used it in my buttercream. So when the cakes were also cooled I made Swiss meringue buttercream, a part of it I flavoured with the raspberry jam, another part I coloured light blue, and the rest I left white. Then I started stacking the cakes, which was cake layer, raspberry buttercream and the other cake layer, for both the 6″ and the 8″. Then I crumb coated them in white buttercream. I also made sure to stack them on a cake board so I could transfer them to the final cake drum. That board I made next. I rolled out some dark blue fondant and with some water, I glued it to a cake drum. Then with my SweetStamp letters, I stamped the ‘Mr & Mrs’ on the fondant. Then with some silver food paint, I coloured it in. The reason I start with the board so early is that the fondant can dry out a bit and the paint will also be dry so it is just easier to work with. In this time the crumb coat from the cakes was set so I could ice them. Since only half of the cake would be blue and the other half white, I only iced the cake blue on one half. There are two reasons for that one, in the end, I want them both to have about the same thickness of icing and on the white side I will be covering it with white fondant. Second, I don’t want the blue colour showing through the white fondant. I let that layer of buttercream set in the fridge. When that was a bit more set I added the white fondant on the other half.
Then it was time to decorate. By this point I had three different things; 2 covered cakes and one covered cake drum. Next, I wanted to add the chocolate drip. But to make sure it would look oke I had to transfer it to the cake drum first. And to transfer a cake I do that right when it comes out of the fridge since everything is nice and set. So I transferred the 8″ cake to the board and added the chocolate drip. For that, I melted some white chocolate and added dark blue chocolate food colouring. When I was happy with the colour I made sure the consistency was right, it shouldn’t be too liquid otherwise it will just flow off your cake, but also not too thick that it will just glob on. Right in between. I also made sure that my cake wasn’t straight from the fridge because when it is that cold the chocolate would set super quickly and I wouldn’t have enough time to spread everything nicely. I dripped it using a piping bag and spread some on top with an offset pallet knife. I let that set in the fridge. When the 8″ was set I stacked the 6″ cake on top of it, making sure that the white/blue border was on the same side. Then I also added the drip to that cake. Then I started decorating the white side. I piped different music notes on with some buttercream I did this with a number 3 tip. Then I piped the border with a small open star tip and finally, I piped the white rosettes with 3 different sizes of open star tips. To finish the blue side I made some meringues with light and dark blue food colouring. I did this by painting four stripes (two of each colour) of food colouring on the side of the piping bag. Then I added the meringue and piped different sizes on a baking sheet with a big round piping tip. When they were done, I added some to the blue side of the cake and glued them in place with some buttercream. I let all the buttercream completely set in the fridge before I added the wooden notes, just in case. When I added the notes I cut a slid with a knife first then pushed them in.
And that is the cake finished. It turned out so pretty, I am really happy with it. And so was the bride! She came and picked it up with her mom and they were so happy about it, she told me that she couldn’t have wished for a better, prettier cake. Which made my day 
I hope you both have a wonderful wedding, it was an honour to make your wedding cake!ai